Use the Add-In Manager from Autodesk
A friend, whom I got to know recently while replying his questions about coding Revit add-ins with F#, brought this question to my attention:
“How could we code efficiently, while we must close Revit before we compile the assembly and re-open Revit afterwards, and repeat this for the 1000th time debugging before the code finally works?”
I asked myself the same question since the very first day when I coded addins for Revit.
The Add-In Manager
While doing researches for this purpose, I’ve learnt much and created an early version of this kind of code (re-)loading engine for F# codes. Since then, I have been using it for writing scripts of external commands. Together with the helpful Intellisense from Visual Studio, much of the time for closing and reopening Revit has been saved while the codes are being debugged and changed. I meant to share this engine soon, when it’s ready. At the meantime, there is a great add-in, named Add-In-Manager, released by Autodesk and zipped within each version of the SDK package.
Now, let’s have a look at it. How to get it and run it in Revit environment.
First thing first, here is where you can get the msi file for the SDK:
https://www.autodesk.com/developer-network/platform-technologies/revit
Visit the page above, and scroll down to the bottom, then you’ll see the links for downloading SDKs for Revit versions respectively.
Run the msi file after you download it, you may find it zipped in a zip file, for instance, the one for Revit 2020.
The installation is just an automated unzipping process to copy all the files into a given folder, and by default it’s under your disk C. I’d just leave it like that since you can just delete it later on once you got the Add-In Manager files. (But I’d suggest to browse around to see if you can came up with some useful tools.)

Load Add-In Manager to Revit
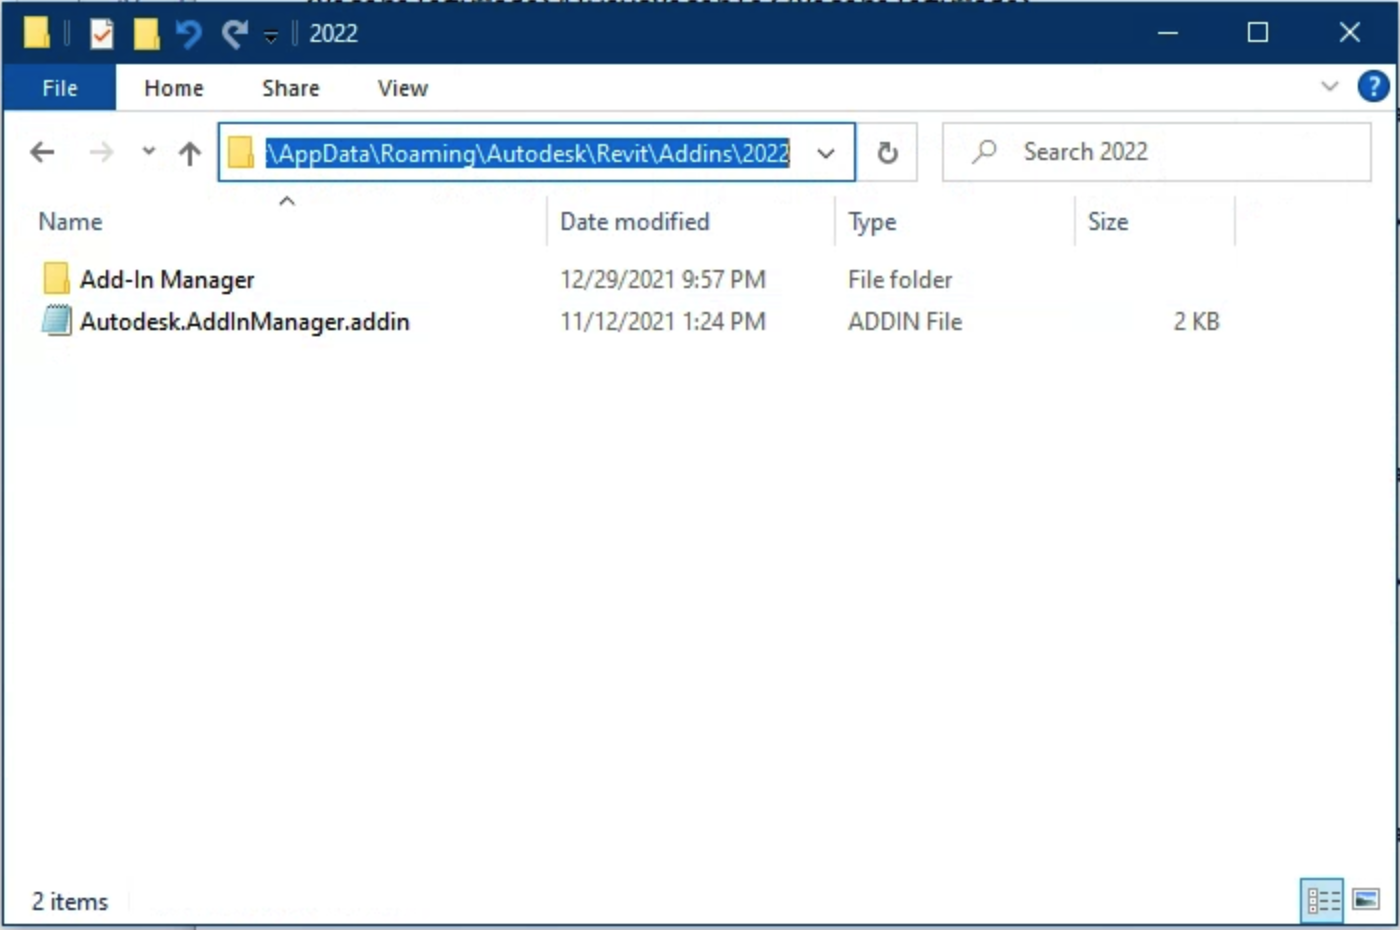
To load it into Revit, all you have to do is have a copy of the Add-In Manager folder that you’ll find in the unzipped folder, and be sure that this copy goes to the right version folder of Revit, where you want to install the Add-In Manager. For example, from the SDK version 2022.1, put the copy into the add-in folder named 2022, which you can find by giving this path to File Explorer in Windows:
%appdata%/autodesk/revit/addins
There is last two more steps left: create the link with Revit and create the shortcut for Add-In Manager.
The link to Revit is through an Add-In file (*.addin), which came with the SDK and can be found within the Add-In Manager folder. For it to work correctly, the path pointing Revit to find the right assembly must be modified before hand.
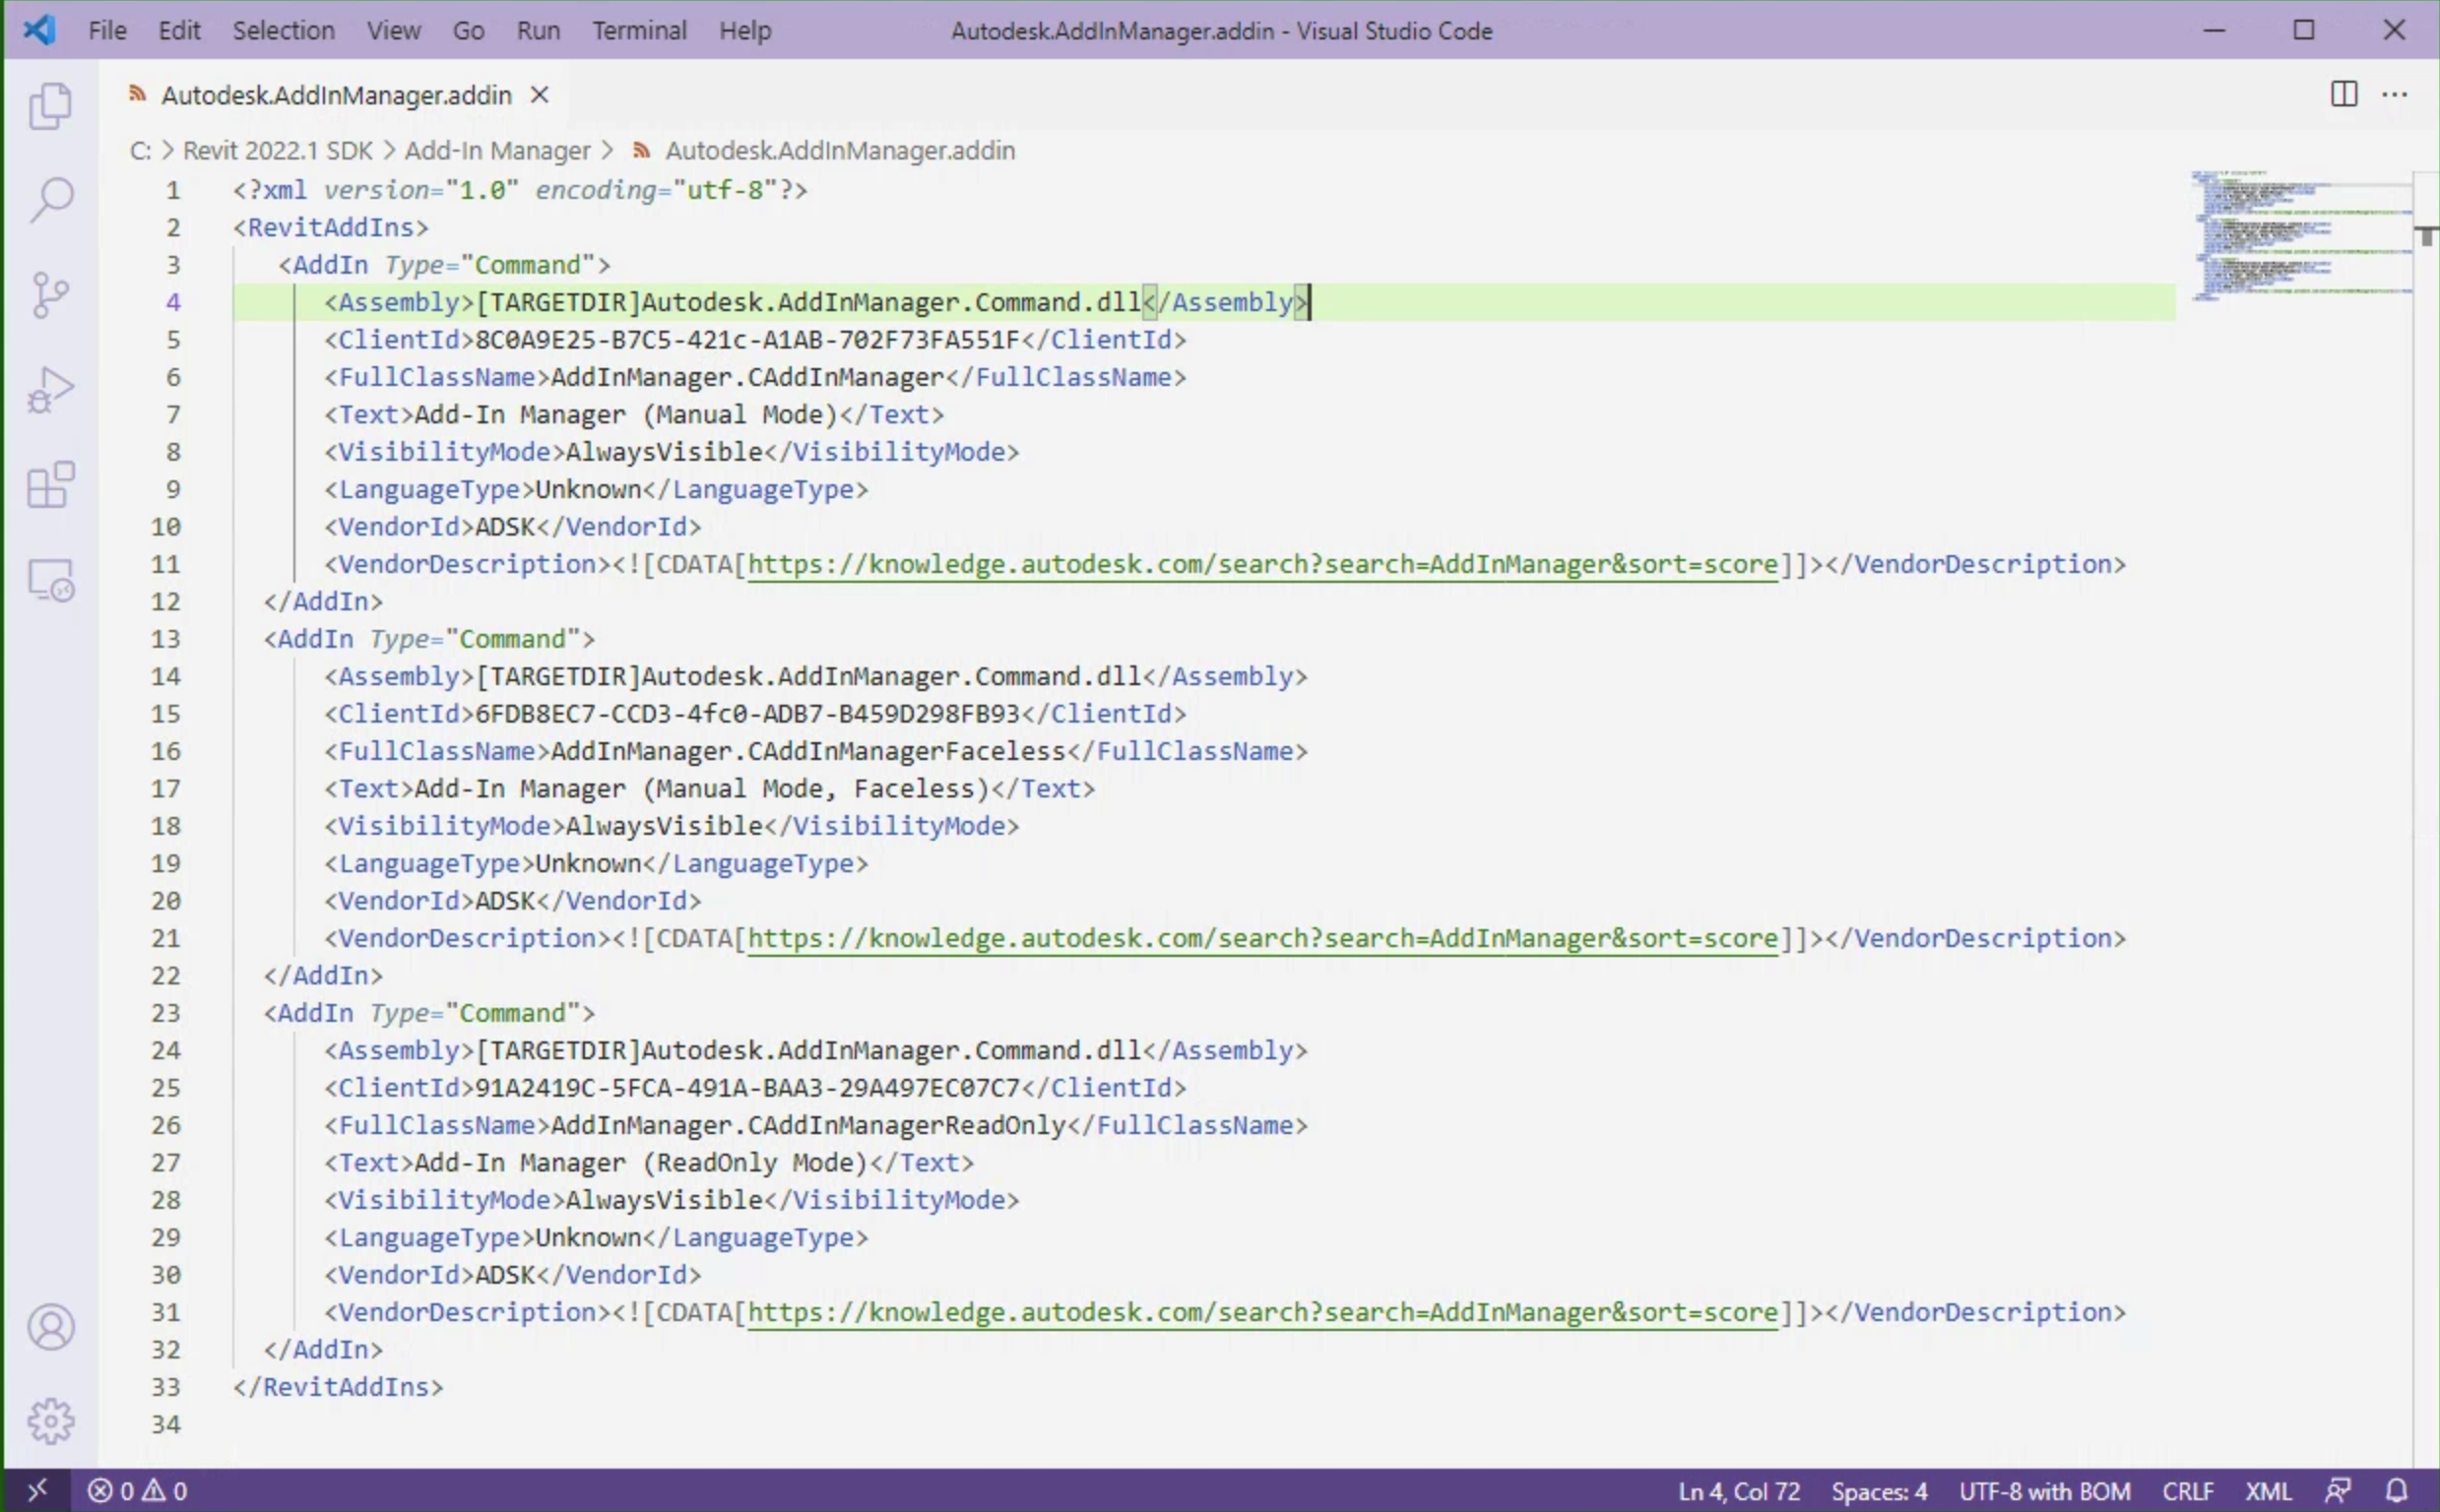
There are three places in the file Autodesk.AddInManager.addin, which is written in xml format, waiting to be modified. If you open the file with Visual Studio Code as I did (shown as picture above), you can find those lines with number 4, 14 and 24. These lines are pointing to the location of the assembly Autodesk.AddInManager.Command.dll. I’d recommend that you put the addin file outside of the Add-In Manager folder and point to the location of the assembly with a relative path as the following:
<Assembly>Add-In Manager\Autodesk.AddInManager.Command.dll</Assembly>
This keep your addin folder organised. For the future addition, you’d have the addins direct in the addin folder and capsulate each of them in separate directories, rather than putting all of them together. It’ll help when you want to update or uninstall a certain addin completely.
Use the Add-In Manager
Now we have the Add-In Manager installed. If you start the Revit program, or if you have it open, you’ll be asked for permission to load the Add-In Manager. Once it’s loaded you’ll find three external commands under the Add-Ins tab, on the External panel and within the External Tools pull-down buttom. The difference between them is well-written within their names. The last one ReadOnly Mode is to run your read-only commands, meaning the model will not be modified with transactions. The second one is directly to repeat the last run command from your assembly without showing an interface for you to choose the command again. Of course this means that your assembly is already loaded and ready for use. If not, it will run the first one, also the basic one instead.

The basic one is the one with the Manual Mode. It shows an interface with all functions within: to load or remove, to show your assemblies and to run your commands. If your assembly is correctly loaded into the manager, you’ll just have to click on the command then hit the Run. If you ran into trouble, just read the reply message and correct your code then compile it again. No open Revit window has to be terminated before you re-run your code. Even if you added (or remove) your commands, just hit load to reload your assembly into the manager - I’d suggest to remove it firsly - you’ll see your change immediately and test your code further without interruption!
Isn’t it amazing!?
Try it out and stay tuned!